
1. Python Package
2. Getting Started — Selenium Python Bindings 2 documentation
2.2. Example Explained The selenium.webdriver module provides all the WebDriver implementations. Currently supported WebDriver implementations are Firefox, Chrome, IE and Remote. The Keys class provide keys in the keyboard like RETURN, F1, ALT etc. from se
selenium-python.readthedocs.io
dload 패키지
dload
A multipurpose downloader for python >= 3.6
pypi.org
openpyxl 패키지
openpyxl - A Python library to read/write Excel 2010 xlsx/xlsm files — openpyxl 3.0.8 documentation
Install openpyxl using pip. It is advisable to do this in a Python virtualenv without system packages: Warning To be able to include images (jpeg, png, bmp,…) into an openpyxl file, you will also need the “pillow” library that can be installed with:
openpyxl.readthedocs.io
wordcloud 패키지
wordcloud
A little word cloud generator
pypi.org
2. 크롤링
셀레니움 웹 드라이버 설치
2-1. Chrome 버전 확인
크롬 우측 상단 세로줄임표 클릭 > 도움말 > Chrome 정보 (아래 이미지 확인)

2-2. 셀레니움 웹드라이버 설치 방법
2-2-1. chromdriver google api 검색 > 버전 확인
2-2-1. 드라이버 설치 링크 > 버전 확인
https://chromedriver.storage.googleapis.com/index.html
chromedriver.storage.googleapis.com

2-3. 셀레니움 사용
from selenium import webdriver

driver = webdriver.Chrome('chromedriver') # 파일 경로
driver.get("http://www.naver.com") # 웹 주소
2-4. 이미지 웹 크롤링
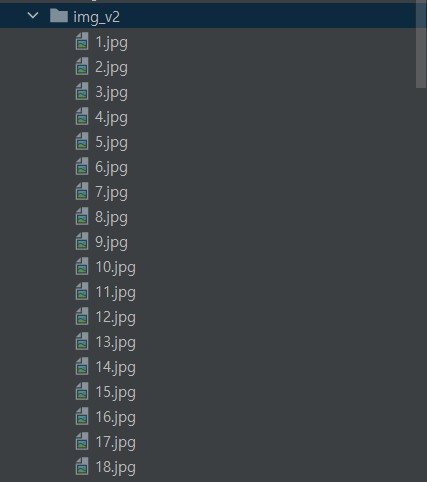
import dload
from bs4 import BeautifulSoup
from selenium import webdriver
import time

driver = webdriver.Chrome('chromedriver')
driver.get("https://search.daum.net/search?w=img&nil_search=btn&DA=NTB&enc=utf8&q=%ED%95%9C%ED%9A%A8%EC%A3%BC")
time.sleep(5)

req = driver.page_source
soup = BeautifulSoup(req, 'html.parser') # soup 변수에 "파싱 용이해진 html"이 담긴 상태

thumbnails = soup.select('#imgList > div > a > img') # copy selector

i = 1 # 파일 이름
for thumbnail in thumbnails:
    img = thumbnail['src']
    dload.save(img,f'img_v2/{i}.jpg')
    i += 1

driver.quit() # 끝나면 닫아주기
기존에 알려준 코드 외에는 응용이 안되는 것이 크다.
네이버, 구글을 이용해서 웹 크롤링은 해보았지만, HTML element가 안 맞아서
src 만으로 전체 이미지가 추출이 안되는 현상을 보게 된다.
구글 에러 : KeyError: 'src'
네이버 에러 : raise InvalidSchema("No connection adapters were found for {!r}".format(url))
이미지 중에 src 속성이 없는 경우가 있게에 src 속성이 있을 때만 이미지를 다운로드 받도록 하는 코드
# KeyError: 'src'

i=1
for thumbnail in thumbnails:
    if thumbnail.has_attr("src"):
	      src = thumbnail["src"]
        dload.save(src, f'imgs/{i}.jpg')
        i+=1
나중에 공식문서 보면서 크롤링 제대로 연습해봐야 할 부분으로 보인다.
2-5. 네이버 News 크롤링

from bs4 import BeautifulSoup
from selenium import webdriver

driver = webdriver.Chrome('chromedriver')

url = "https://search.naver.com/search.naver?where=news&sm=tab_jum&query=추석"

driver.get(url)
req = driver.page_source
soup = BeautifulSoup(req, 'html.parser')

articles = soup.select('#main_pack > section.sc_new.sp_nnews._prs_nws > div > div.group_news > ul > li')
#sp_nws1 > div.news_wrap.api_ani_send > div > a
for article in articles:
    title = article.select_one('div.news_wrap.api_ani_send > div > a').text
    url = article.select_one('div.news_wrap.api_ani_send > div > a')['href']
    comp = article.select_one('div.news_wrap.api_ani_send > div > div.news_info > div.info_group > a.info.press').text.split(' ')[0].replace('언론사','')
    print(title, url, comp)

driver.quit()
중요 포인트 ! 경로가 할 때마다 달라 질 수 있다는 것!
li 경로가 안되면 앞 경로 ul을 사용해야 한다는 것!
한 줄 한 줄 print를 통해 출력 테스트 실시 해야 할 것!
News 크롤링은 이미지 크롤링보다 시간은 다소 많이 소요 되었지만, 찾아면서 풀리는 것을 볼 때 짜릿함은 잊을 수가 없다. 보기에는 코드가 복잡해보일지 모르지만 막상 우리가 알아야 하는 코드는 많지 않다는 것과 눈으로 보고 읽을 수 있으면 어디에 있든지 찾을 수 있다는 것을 알게 된다. 갑자기 이미지 크롤링도 이 방법으로 하면 찾을 수 있지 않을까 조심스레 생각 해본다.
2-5-1 네이버 News 크롤링 엑셀 파일 저장

from openpyxl import Workbook
from bs4 import BeautifulSoup
from selenium import webdriver
driver = webdriver.Chrome('chromedriver')
url = "https://search.naver.com/search.naver?where=news&sm=tab_jum&query=추석"
driver.get(url)
req = driver.page_source
soup = BeautifulSoup(req, 'html.parser')
articles = soup.select('#main_pack > section.sc_new.sp_nnews._prs_nws > div > div.group_news > ul > li')
#sp_nws1 > div.news_wrap.api_ani_send > div > a
wb = Workbook()
ws1 = wb.active
ws1.title = "articles"
ws1.append(["제목", "링크", "신문사", "썸네일"])
for article in articles:
title = article.select_one('div.news_wrap.api_ani_send > div > a').text
url = article.select_one('div.news_wrap.api_ani_send > div > a')['href']
comp = article.select_one('div.news_wrap.api_ani_send > div > div.news_info > div.info_group > a.info.press').text.split(' ')[0].replace('언론사','')
thumbnail = article.select_one('div.news_wrap.api_ani_send > a > img')['src']
ws1.append([title, url, comp, thumbnail])
driver.quit()
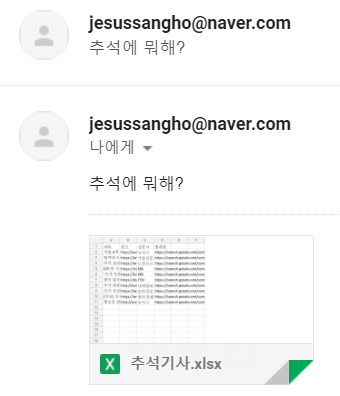
wb.save(filename='articles.xlsx')2-5-2 네이버 News 크롤링 E-mail 보내기 (제목, 내용, 파일첨부)
import smtplib
from email.mime.multipart import MIMEMultipart
from email.mime.base import MIMEBase
from email.mime.text import MIMEText
from email import encoders


# 보내는 사람 정보
me = "[보내는 사람 이메일]"
my_password = "[패스워드]"

# 로그인하기
s = smtplib.SMTP_SSL('smtp.naver.com')
s.login(me, my_password)

# 받는 사람 정보
emails = ['[받는 사람 이메일]', '[받는 사람 이메일]']

for you in emails:
    # 메일 기본 정보 설정
    msg = MIMEMultipart('alternative')
    msg['Subject'] = "[공유] 추석기사"
    msg['From'] = me
    msg['To'] = you

    # 메일 내용 쓰기
    content = "추석에 뭐해?"
    part2 = MIMEText(content, 'plain')
    msg.attach(part2)

    part = MIMEBase('application', "octet-stream")
    with open("articles.xlsx", 'rb') as file:
        part.set_payload(file.read())
    encoders.encode_base64(part)
    part.add_header('Content-Disposition', "attachment", filename="추석기사.xlsx")
    msg.attach(part)

    # 메일 보내고 서버 끄기
    s.sendmail(me, you, msg.as_string())
s.quit()
이메일 같은 경우는 2차 인증 보안이 걸려있으면 크롤링 이메일 보내기가 쉽지가 않다는 점!
gmail : 2차 인증 해제 후 보내봄
naver : naver 이에일로 변경해서 보내봄
이메일 보내기 수업은 그렇게 어렵지 않게 할 수 있었던 것 같다.
꼬이는 코드도 없었고, 인증 말고는 에러 메시지를 볼 수 없었다.
3. 워드 클라우드
3-1. 텍스트 파일 쓰기

f = open("test.txt", "w", encoding="utf-8")
f.write("안녕, 스파르타!")
f.close()
3-2. 텍스트 파일 읽기

with open("test.txt", "r", encoding="utf-8") as f:
    lines = f.readlines()
    for line in lines:
        print(line)
3-3. 워드클라우드 설치 전 C++ 설치
https://visualstudio.microsoft.com/ko/visual-cpp-build-tools/
Microsoft C++ Build Tools - Visual Studio
Microsoft C++ Build Tools는 Visual Studio 없이 스크립트 가능한 독립 실행형 설치 관리자를 통해 MSVC 도구 집합을 제공합니다. 명령줄에서 Windows를 대상으로 하는 C++ 라이브러리 및 애플리케이션을 빌드
visualstudio.microsoft.com
3-4. 폰트 검색
import matplotlib.font_manager as fm

# 이용 가능한 폰트 중 '고딕'만 선별
for font in fm.fontManager.ttflist:
    if 'Gothic' in font.name:
        print(font.name, font.fname)
3-5. 워드 클라우드 만들기
폰트 적용 전
from wordcloud import WordCloud

wc = WordCloud(font_path=font_path, background_color="white", width=600, height=400)
wc.generate(text)
wc.to_file("result.png")
폰트 적용 후
from wordcloud import WordCloud

text = ''
with open("Kakaotalk.txt", "r", encoding="utf-8") as f:
    lines = f.readlines()
    for line in lines:
        text += line

wc = WordCloud(font_path='C:/Windows/Fonts/Hancom Gothic Bold.ttf', background_color="white", width=600, height=400)
wc.generate(text)
wc.to_file("result.png")
3-6. 데이터 클렌징
- 필요한 부분을 삭제 수정하는 것을 말함
from wordcloud import WordCloud

text = ''
with open("Kakaotalk.txt", "r", encoding="utf-8") as f:
    lines = f.readlines()
    for line in lines[5:]:
        if '] [' in line:
            text += line.split('] ')[2].replace('ㅋ','').replace('ㅎ','').replace('이모티콘\n','').replace('사진\n','').replace('삭제된 메시지입니다','').replace('넹','').replace('넵','').replace('저','').replace('저는','').replace('잘','').replace('는','').replace('너무','')

# print(text)

wc = WordCloud(font_path='C:/Windows/Fonts/Hancom Gothic Bold.ttf', background_color="white", width=600, height=400)
wc.generate(text)
wc.to_file("result.png")
데이터 클렌징 작업은 불필요하게 커져 있는 요소들을 삭제 해주는 작업이 필요함
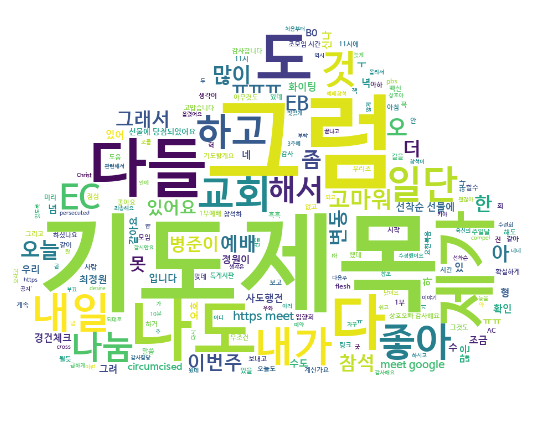
3-7. 워드클라우드 (이미지 마스크 작업)
from wordcloud import WordCloud
from PIL import Image
import numpy as np

text = ''
with open("Kakaotalk.txt", "r", encoding="utf-8") as f:
    lines = f.readlines()
    for line in lines[5:]:
        if '] [' in line:
            text += line.split('] ')[2].replace('ㅋ','').replace('ㅎ','').replace('이모티콘\n','').replace('사진\n','').replace('삭제된 메시지입니다','').replace('넹','').replace('넵','').replace('저','').replace('저는','').replace('잘','').replace('는','').replace('너무','')

# print(text)

mask = np.array(Image.open('cloud.png'))
wc = WordCloud(font_path='C:/Windows/Fonts/Hancom Gothic Bold.ttf', background_color="white", mask=mask)
wc.generate(text)
wc.to_file("result_masked.png")
완성된 이미지 보면서 내심 뿌듯함을 느끼게 된다.
중간 중간 막혔던 부분과 추석이라는 메리트로 컴퓨터 시간 활용을 잘 내지 못해서
아쉽지만 제 시간에 못했다는 점이 크다.
그럼에도 완료 했기에 크롤링에 대해 알아가는 시간이 되어서 보람찬 시간이 되었다.
스파르타코딩클럽에서 연휴마다 제공하는 프로젝트는 알차게 유용해서 모두가 따라해보아도 강력 추천한다.
댓글